本文介绍了基于PXE和Kickstart实现 Rocky Linux 9.3自动安装的配置方法,包 括FTP服务搭建、安装介质准备、 Kickstart文件编写、Syslinux引导配置及DHCP服 务器设置等关键步骤。
PXE自动装机(rocky9)h1
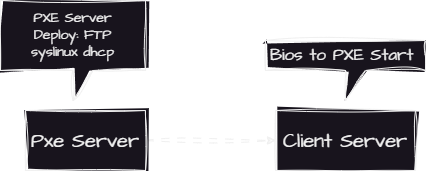
什么是PXE自动装机
PXE(预启动执行环境)提供了一种使计算机通过网络启动的机制。当系统通过网络启动时,BIOS使用PXE进行引导,然后加载一个提供于网络上的操作系统映像。
什么是Kickstart
PXE并不能决定该安装哪种操作系统、如何安装以及安装过程中的各种设置如何配置。这就是Kickstart文件的作用。Kickstart文件包含了自动安装中所有的配置,例如安装哪些包、如何分割硬盘等。
基础环境h2
注意! 下文中的pxe_server_ip即为pxe_server_ip : )
systemctl disable firewalld --nowsetenforce 0 # 记得配置持久化ftp 配置h2
我们使用 FTP 将操作系统安装介质共享到 PXE 引导客户端。
安装 vsftpd 包并确保启用服务:
yum install vsftpd -ysystemctl enable vsftpd配置 /etc/vsftpd/vsftpd.conf :
anonymous_enable=YESlocal_enable=NOwrite_enable=NOlocal_umask=022dirmessage_enable=YESxferlog_enable=YESconnect_from_port_20=YESxferlog_std_format=YESftpd_banner=Welcome to homelab FTP service.listen=YESlisten_ipv6=NOlisten_port=21pam_service_name=vsftpduserlist_enable=YEStcp_wrappers=YESpasv_enable=YESpasv_address=pxe_server_ippasv_min_port=60000pasv_max_port=60029systemctl start vsftpd安装 tftp-server 软件包并确保启用该服务:
yum install tftp-server -ysystemctl enable tftp && sudo systemctl start tftp安装介质h2
下载 Rocky-9.3 ISO 映像。确保下载完整的DVD版本,例如:
# https://dl.rockylinux.org/pub/rocky/9/isos/x86_64/Download Rocky-9.3-x86_64-dvd.iso挂载映像并将其内容复制到 FTP 位置:
mkdir -p /mnt/iso /var/ftp/pub/pxe/Rocky-9.3-x86_64mount Rocky-9.3-x86_64-dvd.iso /mnt/isocp -prv /mnt/iso/* /var/ftp/pub/pxe/Rocky-9.3-x86_64/umount /mnt/iso验证:
curl ftp://pxe_server_ip/pub/pxe/Rocky-9.3-x86_64/drwxr-xr-x 4 0 0 38 Nov 12 08:03 AppStreamdrwxrwxr-x 4 0 0 38 Nov 12 22:40 BaseOSdrwxrwxr-x 3 0 0 18 Nov 12 21:32 EFI-rw-r--r-- 1 0 0 2204 Oct 20 2023 LICENSEdrwxrwxr-x 3 0 0 59 Nov 12 21:32 imagesdrwxrwxr-x 2 0 0 239 Nov 12 21:32 isolinux-rw-r--r-- 1 0 0 101 Nov 12 22:33 media.repo创建 Kickstart 文件h2
这是我用于我的 Rocky-9.3-x86_64-dvd.iso 服务器(需要 32GB 磁盘)的 kickstart 文件 /var/ftp/pub/pxe/Rocky-9.3-x86_64.cfg 。
# Use network installationurl --url="ftp://pxe_server_ip/pub/pxe/Rocky-9.3-x86_64/BaseOS/"repo --name="AppStream" --baseurl="ftp://pxe_server_ip/pub/pxe/Rocky-9.3-x86_64/AppStream/"# Disable Initial Setup on first bootfirstboot --disable
# Use text mode installtext# Keyboard layoutskeyboard --vckeymap=gb --xlayouts='gb'# System languagelang en_GB.UTF-8# SELinux configurationselinux --enforcing# Firewall configurationfirewall --enabled --ssh# Do not configure the X Window Systemskipx
# Network information# network --bootproto=dhcp --device=ens18 --nameserver=8.8.8.8 --noipv6 --activatenetwork --bootproto=dhcp --device=ens18  --noipv6 --activate
# System authorisation informationauth --useshadow --passalgo=sha512# Root passwordrootpw pass123# Root SSH public keysshkey --username=root "id_rsa.pub文件内容"# System timezonetimezone Asia/shanghai --utc
ignoredisk --only-use=sda# System bootloader configurationbootloader --location=mbr --timeout=1 --boot-drive=sda# Clear the Master Boot Recordzerombr# Partition clearing informationclearpart --all --initlabel# Reboot after installationreboot
# Disk partitioning information#autopart --type=lvmpart /boot --fstype="xfs" --ondisk=sda --size=1024 --label=boot --asprimary --fsoptions="rw,nodev,noexec,nosuid"part pv.01 --fstype="lvmpv" --ondisk=sda --size=31743volgroup vg_os pv.01
# 根据需求配置分区# logvol /home  --fstype="xfs" --size=1024 --label="lv_tmp" --name=lv_tmp --vgname=vg_os --fsoptions="rw,nodev,noexec,nosuid"logvol /  --fstype="xfs" --size=31743 --label="lv_root" --name=lv_root --vgname=vg_os
%packages# dnf group info minimal-environment@^minimal-environmentsudoqemu-guest-agentopenssh-server# Alsa not needed in a VM-alsa*# Microcode updates cannot work in a VM-microcode_ctl# Firmware packages are not needed in a VM-iwl*firmware# Don't build rescue initramfs-dracut-config-rescue-plymouth%end
%addon com_redhat_kdump --disable --reserve-mb='auto'%end
%postsed -i 's/^.*requiretty/#Defaults requiretty/' /etc/sudoerssed -i 's/rhgb //' /etc/default/grub# SSHD PermitRootLogin and enable the servicesed -i "s/#PermitRootLogin prohibit-password/PermitRootLogin yes/g" /etc/ssh/sshd_config/usr/bin/systemctl enable sshd# Update all packages# /usr/bin/yum -y update
# 其他需要执行的脚本%end
复制内容并将其另存为 /var/ftp/pub/pxe/Rocky-9.3-x86_64.cfg
安装 Syslinuxh2
Syslinux 项目涵盖了用于网络引导的轻量级引导加载程序 (PXELINUX) 等。
安装 syslinux 软件包:
yum install syslinux -y将 syslinux 引导加载程序复制到 tftp 服务器的引导目录:
cp -prv /usr/share/syslinux/* /var/lib/tftpboot/将 Rocky-9.3-x86_64-dvd.iso 安装介质复制 initrd.img 到 vmlinuz /var/lib/tftpboot/networkboot/Rocky-9.3-x86_64/ :
mkdir -p /var/lib/tftpboot/networkboot/Rocky-9.3-x86_64cp -pv /var/ftp/pub/pxe/Rocky-9.3-x86_64/images/pxeboot/{initrd.img,vmlinuz} /var/lib/tftpboot/networkboot/Rocky-9.3-x86_64/创建 PXE 配置目录:
mkdir -p /var/lib/tftpboot/pxelinux.cfg创建 /var/lib/tftpboot/pxelinux.cfg/default 包含以下内容的 PXE 启动配置文件:
# vim /var/lib/tftpboot/pxelinux.cfg/defaultdefault menu.c32prompt 0timeout 50menu title Homelab PXE Menulabel Install Rocky Linux 9 Server kernel /networkboot/Rocky-9.3-x86_64/vmlinuz append initrd=/networkboot/Rocky-9.3-x86_64/initrd.img inst.repo=ftp://pxe_server_ip/pub/pxe/Rocky-9.3-x86_64/ inst.ks=ftp://pxe_server_ip/pub/pxe/Rocky-9.3-x86_64.cfgdhcp配置h2
yum install dhcpd -yvim /etc/dhcp/dhcpd.confddns-update-style interim;
allow booting;allow bootp;
ignore client-updates;set vendorclass = option vendor-class-identifier;
option pxe-system-type code 93 = unsigned integer 16;
subnet 192.168.0.0 netmask 255.255.255.0 { option routers pxe_server_ip; option domain-name-servers pxe_server_ip; option subnet-mask 255.255.255.0; range dynamic-bootp 192.168.0.150 192.168.0.200; default-lease-time 21600; max-lease-time 43200; next-server pxe_server_ip; filename "pxelinux.0";
}
# group for Cobbler DHCP tag: defaultgroup {}接下来就是用网线, 把pxeserver + server接通然后, 把server从Network启动即可
